About five minutes. No audio required, just curiosity.
Before you make anything, let’s walk around the room. FastTracker’s Multitrack window is where we start (Single Track Mode has its own, simpler tour in Single Track 1), and once you know what everything in it is called, the rest of this guide will make a lot more sense. (Also, you’ll be able to impress people at parties.)
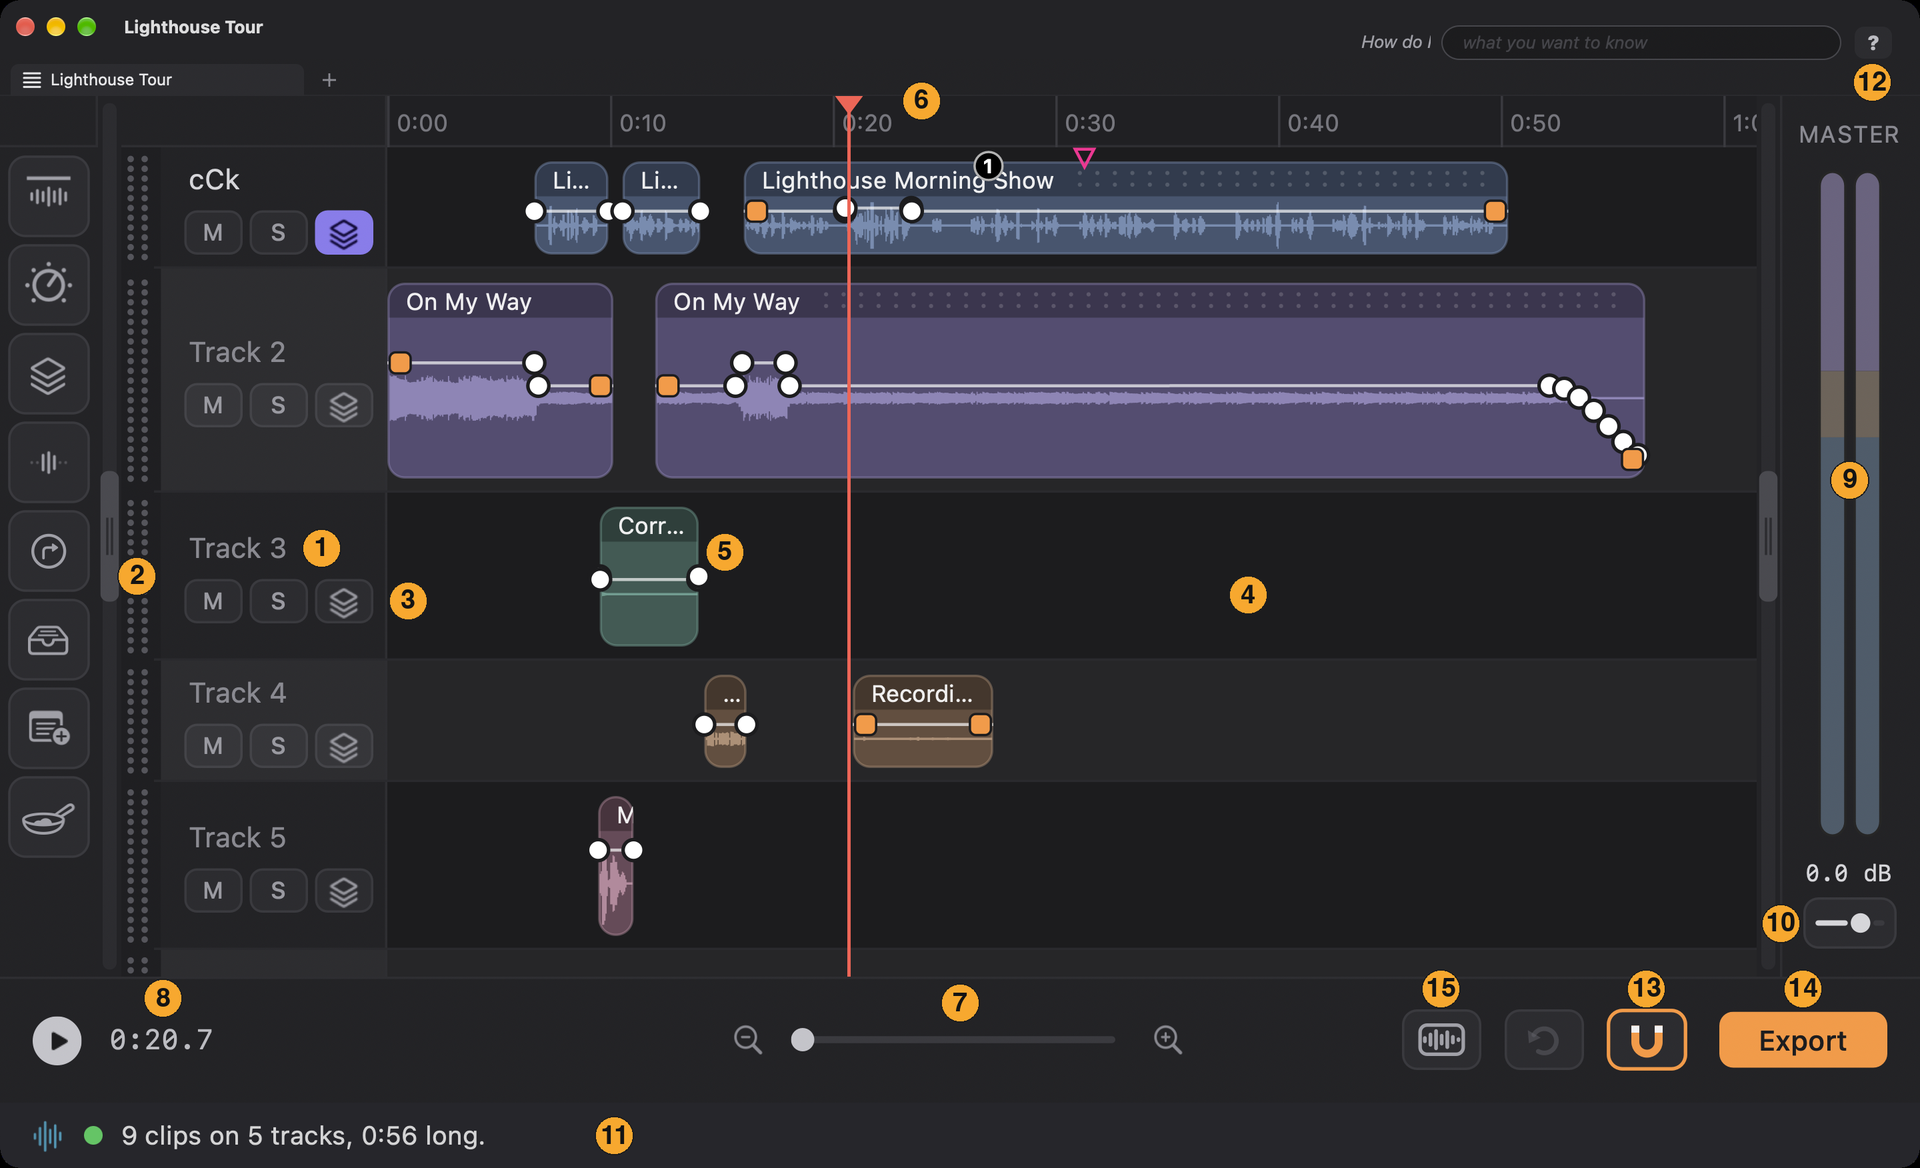
The whole window, with the parts numbered. We’ll go through them in order. (The column of buttons at the far left is the favorites bar, described below.)
The Welcome Window
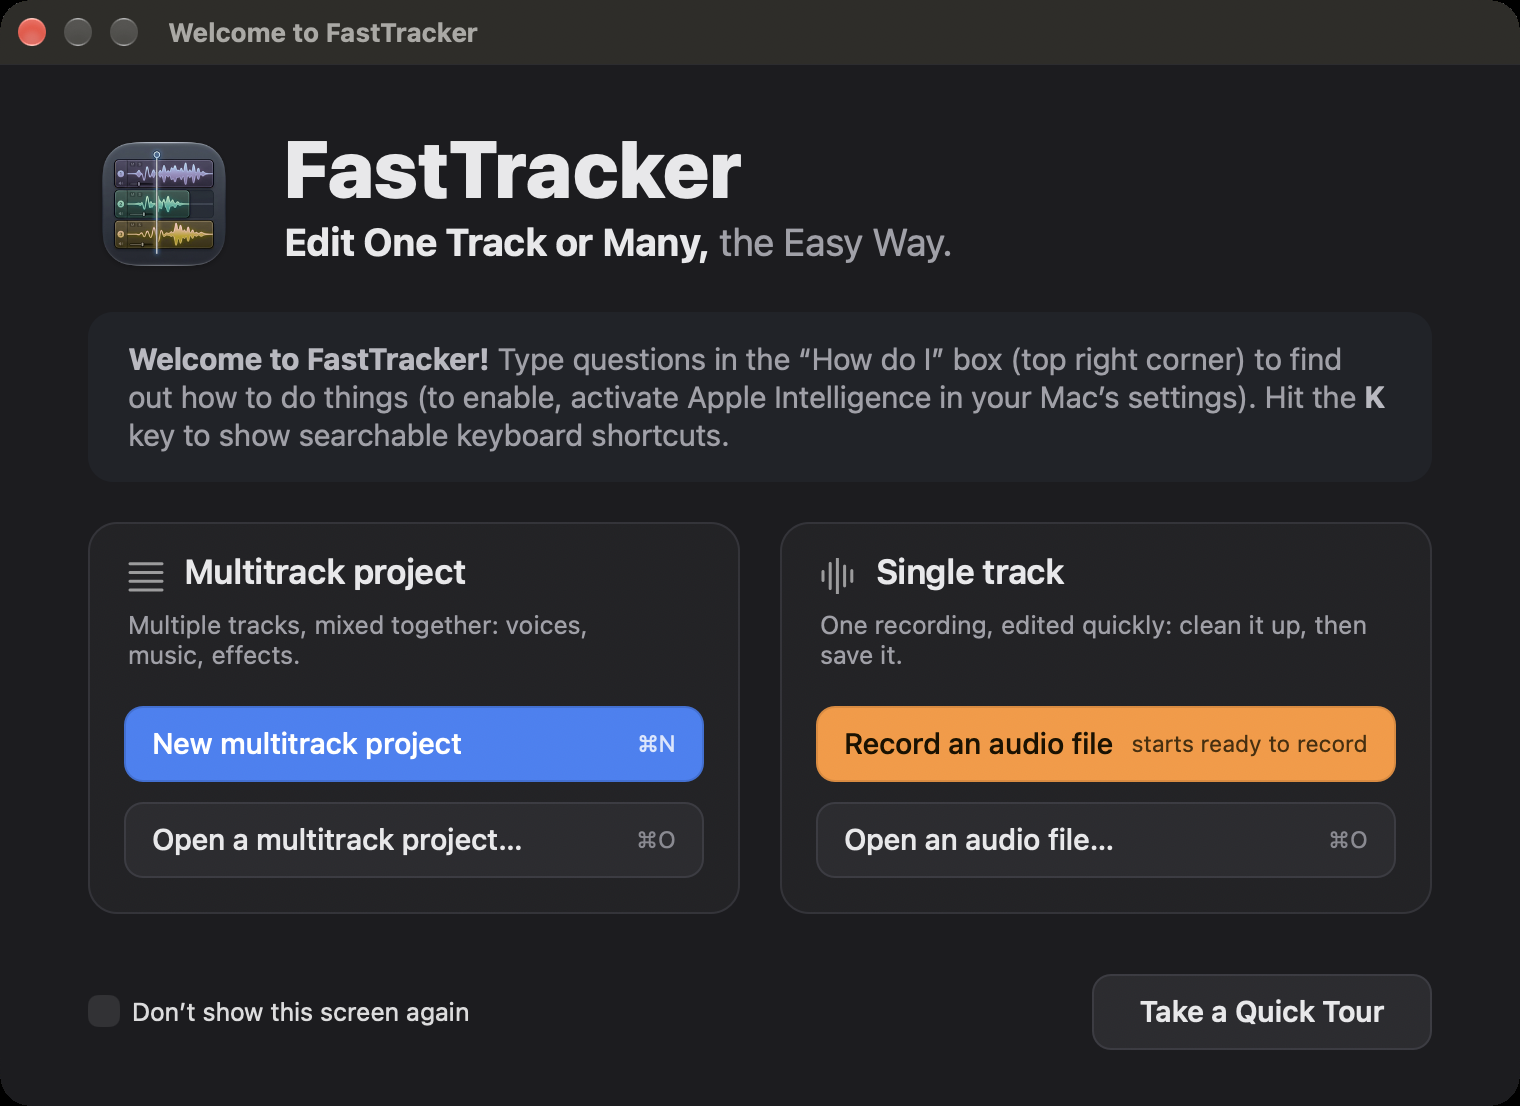
FastTracker is two editors in one, so the first thing it does is ask which one you want. Every time FastTracker starts, and whenever you close the last tab, it greets you with the Welcome Window instead of a blank screen. (It no longer reopens your last project or tabs for you. If you would rather have that, turn on Open the last project at startup in Settings.) Its slogan is “Edit One Track or Many, the Easy Way,” and it lives up to it by asking you one question: what would you like to do?
Multitrack project (“Several tracks, mixed together: voices, music, effects.”) is for building with many tracks: New multitrack project or Open a multitrack project….
Single track (“One recording, edited quickly: clean it up, then save it.”) is for working on one audio file: Record an audio file or Open an audio file…. (More about Single Track Mode.)
Under the slogan a short message points you onward. During the free trial it reads: Welcome to the FastTracker 14 day free trial! Type questions in the “How do I” box (top right corner) to find out how to do things (to enable it, activate Apple Intelligence in your Mac’s settings). Hit the K key to show searchable keyboard shortcuts. On a licensed copy it starts “Welcome to FastTracker!” instead. (On a Mac without the How do I box, the sentences about it are left out.) More about the trial.
At the lower right, Take a Quick Tour opens a short, screen-by-screen introduction (see the Quick Tour). It is the only button there. Closing the tour brings you back to the Welcome Window.
You can choose without the mouse: ← and → pick between the two cards, and Return starts a new project in the card you picked. The card for the kind of project you used last is already highlighted, so on most days it is Return and go.
While the Welcome Window is up, no project window shows behind it. The window you chose appears only when it is ready: Open an audio file and Record an audio file bring up the Single Track window, and New multitrack project the Multitrack window. Using a menu command also brings up a window. Click FastTracker’s Dock icon while the Welcome Window is showing and it comes to the front. It follows your Appearance setting, dark in Dark and light in Light.
The red close button on the Welcome Window opens whichever kind of project you used last. If that was Single Track Mode, you get a new recording document (with the usual question about the settings); otherwise, and when you have not chosen yet, you get a Multitrack project.
The Welcome Window in the dark look, as it appears on a licensed copy. (During the free trial the message names the trial and there is no “Don’t show” box.)
During the free trial the Welcome Window always opens. Once you have entered a License Key, a Don’t show this screen again box appears; tick it and FastTracker starts without the Welcome Window, in the kind of project you used last: if that was a Single Track one, you go straight to the usual question about the new document’s settings and then an empty Single Track window (Cancel gives you a blank Multitrack project instead); otherwise you start in Multitrack Mode. (If Open the last project at startup is on in Settings, that wins.) You can still reach the Welcome Window any time by closing your last tab.
Tracks and Lanes
Audio lives on tracks, stacked from top to bottom like layers. Every track has two sides: a header on the left that holds its controls, and a long horizontal lane on the right where its audio sits. FastTracker opens with five empty tracks, and there’s always one empty one waiting at the bottom, so you’ll never run out of room. (Need one in the middle? Choose a track and press ⌘T to add a new empty track right below it.)
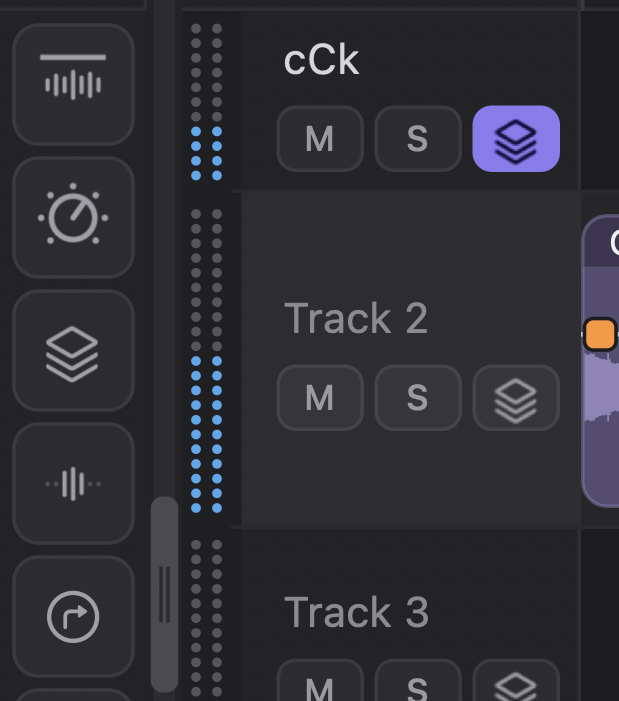
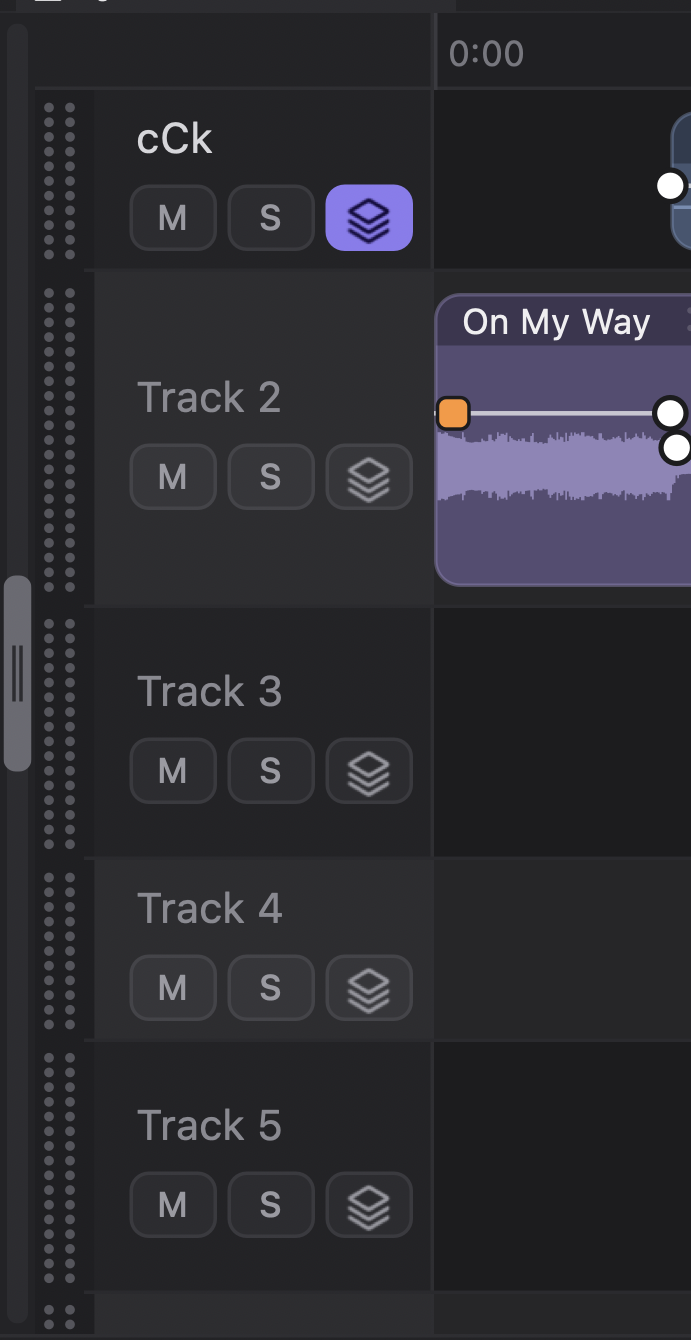
A track header up close: the dot meter (lit here) on the left, the name, and M, S and FX under it. The buttons at the far left belong to the favorites bar.
1Track name. Click it and type to rename the track. “Voiceover” is a lot more helpful at 2 a.m. than “Track 1.”
2The dot meter and grab bar. The two columns of round dots on the far left are this track’s own level meter. The dots light from the bottom up with the sound on that track while you play, in the same colors as the master meters. The same strip is also the handle: drag it up or down to put the track in a new position (the meter keeps working while you drag). Click it without moving and the track’s fader opens, which we’ll do in a moment. Short tracks show fewer dots. You can also drag the line under a track to make it taller or shorter (double-click that line to snap back to standard height).
3M, S and FX. Under the name sit three buttons. Mute silences the track. (ShiftM does the same for the chosen track, or for just the clips you’ve selected: see Lesson 3.) Solo silences everything except this track (handy for hearing what a single track is up to). FX (three small stacked cards) opens the Effects Deck for that track. Lessons 3 and 4 have the details.
4The lane. This is where audio goes. An empty lane says Drop audio here, and it means it: drag a file from Finder onto it.
5A clip. Every piece of audio in a lane is a clip. The bar across the top holds its name, and the white line running through it is its volume line (more in Lesson 3).
Setting a Track’s Volume
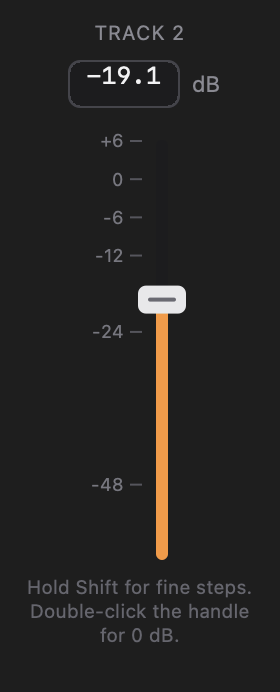
Click the track’s dot meter (2) and a small fader pops up. Drag the handle to set that track’s volume anywhere from silent to +6 dB, or type a number into the box at the top. Hold Shift while dragging for fine steps, and double-click the handle to return to 0 dB.
The fader that opens when you click a track’s dot meter.
The Favorites Bar
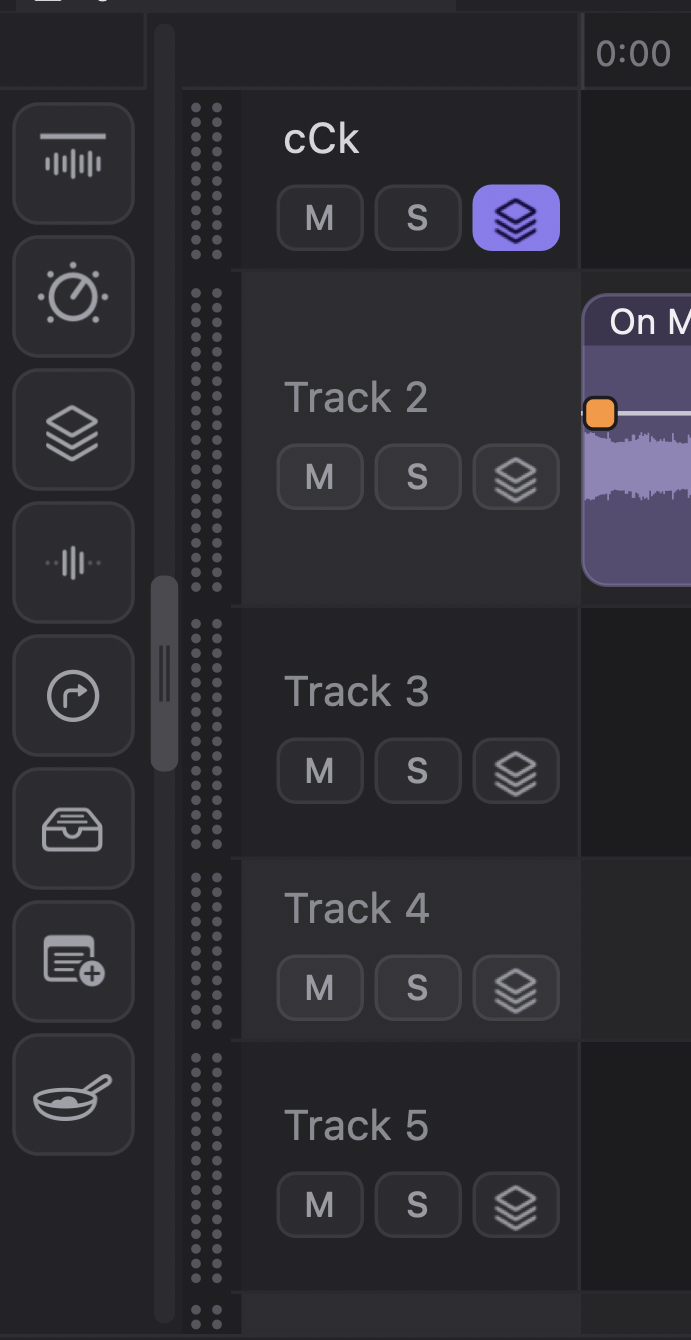
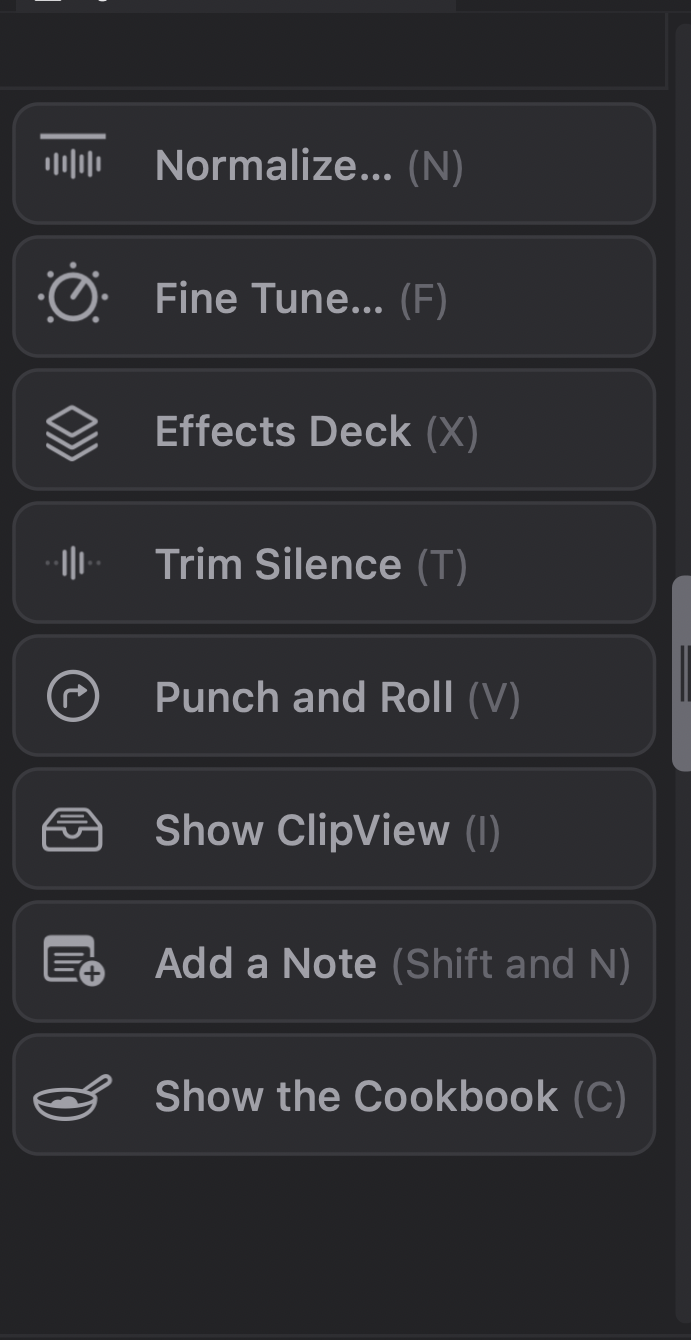
At the far left of the window is the favorites bar, a column of one-click buttons for the commands you use most. It has its own grab bar. With the bar folded away you see only the grab bar; drag it one notch and the buttons appear as icons, and drag further and each one shows its name. It starts with Normalize, Fine Tune, Effects, Trim Silence, Punch and Roll, ClipView, Add a Note and the Cookbook.
To make it yours, hold Option and click any menu item that works in the Multitrack window: that command joins the bar, and Option-clicking it again takes it off. The Multitrack bar keeps its own list, separate from the Single Track Mode bar.
Folded: only the grab bar shows.One notch: icons.Dragged further: each button shows its name.
Time and Place
6The ruler and the playhead. The ruler across the top counts seconds. The red line is the playhead, which is the moment you’re listening to and the place where pasted clips land. Click the ruler (or an empty part of a clip) to move it. The little red triangle on top of the playhead can be dragged to mark a selection on a track for cutting or changing the volume (Lesson 2), and Shift-Space plays from the very start.
7The zoom slider. Slide right to zoom in for fine work, left to see the big picture. The magnifier buttons at either end do the same in steps. You can zoom in close enough to see a single millisecond, and the ruler and the clock count in hundredths and thousandths of a second to match. (Or just tap Z to zoom out to the whole project, and again to come back.)
8Play, and the clock. The round button plays and pauses, and the readout beside it shows where the playhead is. You’ll usually just tap Space instead.
Play button and clock on the left, zoom slider in the middle.
The Master Section
9Master meters. The two tall bars on the right show the final left and right levels of your mix, the sum of every track. Keep them out of the top zone and your mix will stay clean.
10Master fader. The small slider beneath the meters. It raises or lowers the whole mix at once and works just like a track’s fader: Shift for fine steps, double-click for 0 dB.
Help Is Always Underfoot
This is the part we’re proudest of. The long bar at the bottom of the window is the status bar, and it is chatty in the good way. Point at almost anything and it tells you what it is and what it does. It also reports what just happened (“Saved…”, “Added…”) and what your project is made of.
11Status bar. Hover over a control, a clip, or a lane and read the line of help it shows. Learning FastTracker by hovering is a perfectly respectable method.
12The question mark. Top right corner. Click it and this manual opens in a window, right inside FastTracker. (⌘? does the same.)
Hovering over a track: the status bar explains it.
The “How do I…” Box
Near the top right of the window, the words How do I sit just left of a quiet box (inside it, a very faint prompt reads what you want to know). Type a question in your own words (“How do I cut out a cough?”), press Return, and a small window answers it, with a link or two to the manual under More info. FastTracker picks from answers we wrote ourselves, so it never makes up keys or features. If it can’t find what you asked, it says so and points you to the manual, the Keys page and our Contact form.
The box uses Apple Intelligence, which runs on your Mac, so what you type stays there. If your Mac has Apple Intelligence but it is turned off, the box offers to open the setting for you; if your Mac doesn’t have it, the box doesn’t appear. The letter keys work as usual until you click in the box.
Helping us improve the answers. By default, each question you ask (and which answer it got) is sent to TuneTracker Systems, anonymously, strictly to help improve our answers for the future. We do not record your name, license, computer or IP address, and we remove email addresses, web addresses, file paths and long numbers from the questions before we keep them. Please don’t include personal details in a question. Two small thumbs buttons in the answer window let you tell us whether the answer helped. If you would rather not, turn off Send questions anonymously in Settings: nothing is sent and the thumbs go away.
And Finally
13The magnet. This turns Snap on and off. When it’s on (the magnet turns orange), a clip you drag jumps onto the edge of a nearby clip, or onto the playhead, so clips line up perfectly with no fiddling. It starts out off, and FastTracker remembers your choice. Lesson 3 has more.
14Export. The orange button in the lower right (or ⌘E) is how your finished project leaves FastTracker as a real audio file. Lesson 2 gets you there.
15The Mode Button. The button with a small waveform on it, just left of Undo. Click it and the chosen track (or the part of it you’ve marked) opens on its own in Single Track Mode; click it again, now showing bars, to return to Multitrack Mode with all your tracks.
The Undo button. Just to the left of the magnet is a button with a circle and a backward arrow. It lights up when there’s something to undo, and each click takes back one step, the same as ⌘Z.
Try it now: tap K and the Keyboard Guide slides out at the right edge, with its search box ready: type a word like split or limiter to see just the keys that match (tap Esc to clear the search, and again to put the guide away). Then press OptionM to switch to full-screen Max Mode, press it again to come back, and tap Z twice. You only ever need to remember K, and you didn’t even open a file.