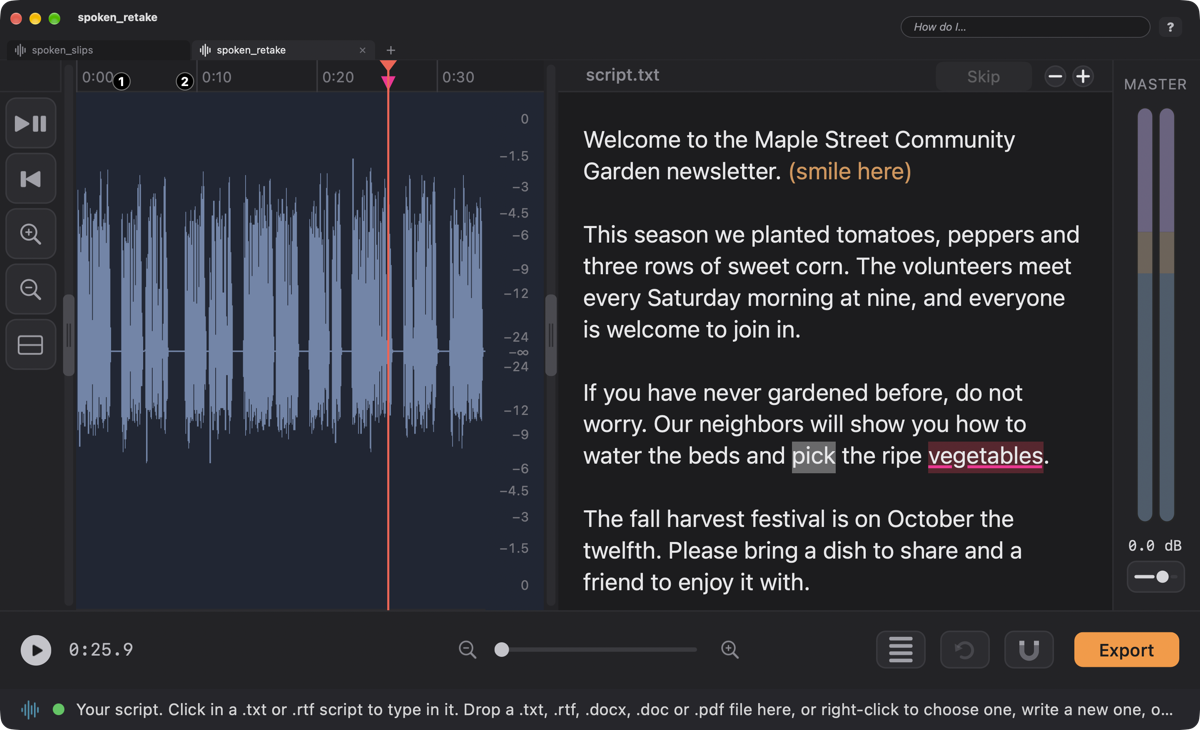
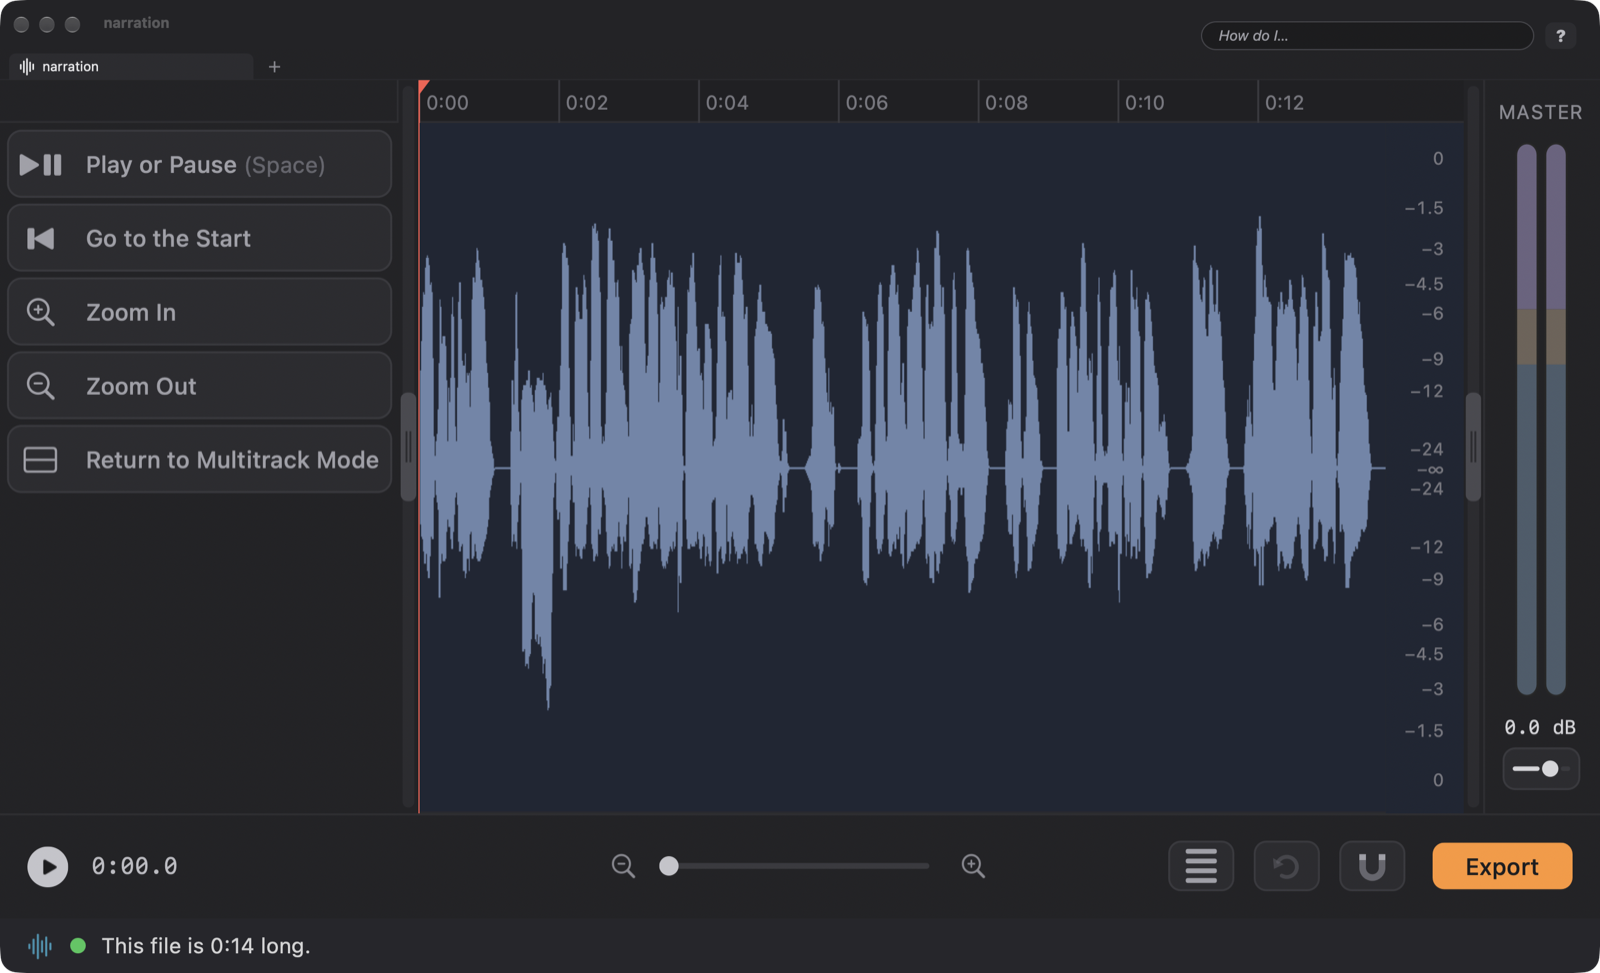
FastTracker works in two modes, and the whole difference is in the names:
.fast packages) with many tracks that play together.The Mode Button, at the lower right just left of Undo, switches between the two.
Five ways, all easy:
If you opened an audio file (or recorded a new one) in the window, the Mode Button brings it to Track 1 of the project behind it, with its markers and script, and asks nothing, as long as that project is still empty. (If the project already has clips, the window just closes, asking first about unsaved changes.) The file itself is never changed. Mono stays mono. On a brand-new document with nothing recorded yet, the Mode Button simply closes the window and puts you back on that tab’s project.
Click the Mode Button again (it now shows bars) or choose File ▸ Return to Multitrack Mode. If you changed something in the window, the result comes back to your project as a new track named after the original with “, Edited” added, directly below it. Visit again and you get “, Edited 2”, “, Edited 3”, and so on. The new track starts unmuted, with no effects and a neutral fader. If you changed nothing (markers alone don’t count), nothing is added; File ▸ Return and Add the Track Anyway adds it regardless. Renamed the track in the window (double-click its name on the tab)? The new track uses your name, as “your name, Edited”, and the Save As window offers the same name for the file. If the window was opened on a mix rather than one track, the result is “Mix, Edited”, below the lowest track that has audio there.
The original track is never touched, so you can always compare “before” and “after” by soloing one or the other.
Drag across the waveform to mark a selection. Its length (like 0:03.2) shows at the bottom of the selection, in both modes. Then:
| Do this | To get this |
|---|---|
| Delete | Cut the selection out and close the gap. (⌘X does the same and keeps a copy.) |
| ⌘C, ⌘V | Copy the selection, and paste it in at the playhead. Everything after it moves over to make room. You can copy or cut in one window and paste in another (another tab). |
| P | Pop Fixer: take the low thump out of a breath pop (a P or B) in the selection and leave the voice alone. Drag across just the pop and a little around it, tap P, and click Apply. One slider, starting at 50. See Take Out a Breath Pop. |
| N, F, L | Normalize, Fine Tune or Simple Limiter: set how loud, turn it up or down by a few dB, or bring the loudest peaks down to a ceiling. With nothing marked they work on the whole file. See Work on a selection. |
| , and . (or Shift < and Shift >) | Fade in and fade out: a straight line from silence, or down to it. A longer selection makes a more gradual fade. |
| S | Mute or unmute the selection (or just one channel of a stereo selection). A muted selection shows as a flat line, so you can see what is silent. |
| ShiftS | Insert silence at the playhead. With a selection marked, the silence replaces the selection, at the length you type. It goes in as real audio, a clip of silence you can cut, copy, fade or Fine Tune like any other, and it works at the very end of the file too. Nothing is left marked afterward, and the playhead sits at the start of the silence. |
| Home, End | Jump the playhead to the start or the end of the recording. |
| R | Record at the playhead. What you record goes in right there and everything after it moves along. Tap R (or Space) to stop; Esc throws it away. The waveform grows as you record. One ⌘Z takes the whole recording back. |
| Audio ▸ Reverse the Selection | Plays the selection back to front. |
| Audio ▸ Trim Unselected Audio | Keeps only the marked selection and takes away everything else. ⌘Z brings it back. |
⌘Z undoes, ⇧⌘Z redoes. The history belongs to this visit to the window. Stereo files show the left channel above the right, and you can work on just one of them: see Work on one channel of a stereo clip. Not here yet: dropping more audio in, and moving or splitting pieces. For those, go back to Multitrack Mode.
Plain ⌘V opens up room and pushes everything along. Paste Over does the opposite: it mixes the copied audio on top of what is already there. Perfect for laying a laugh, a sting or a bit of room tone over a voice without moving a thing.
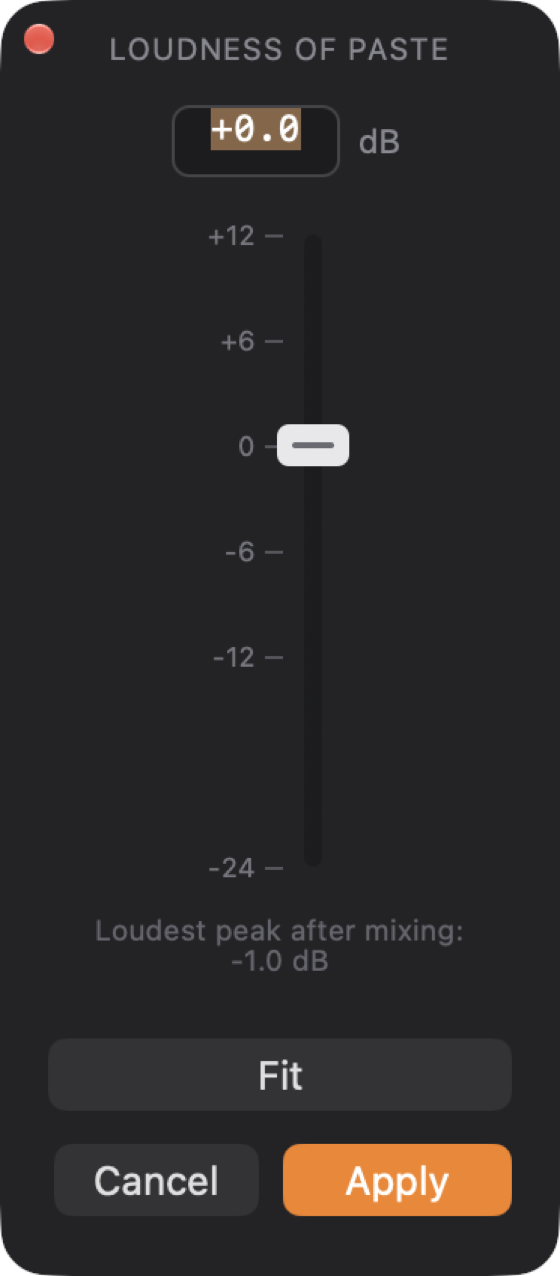
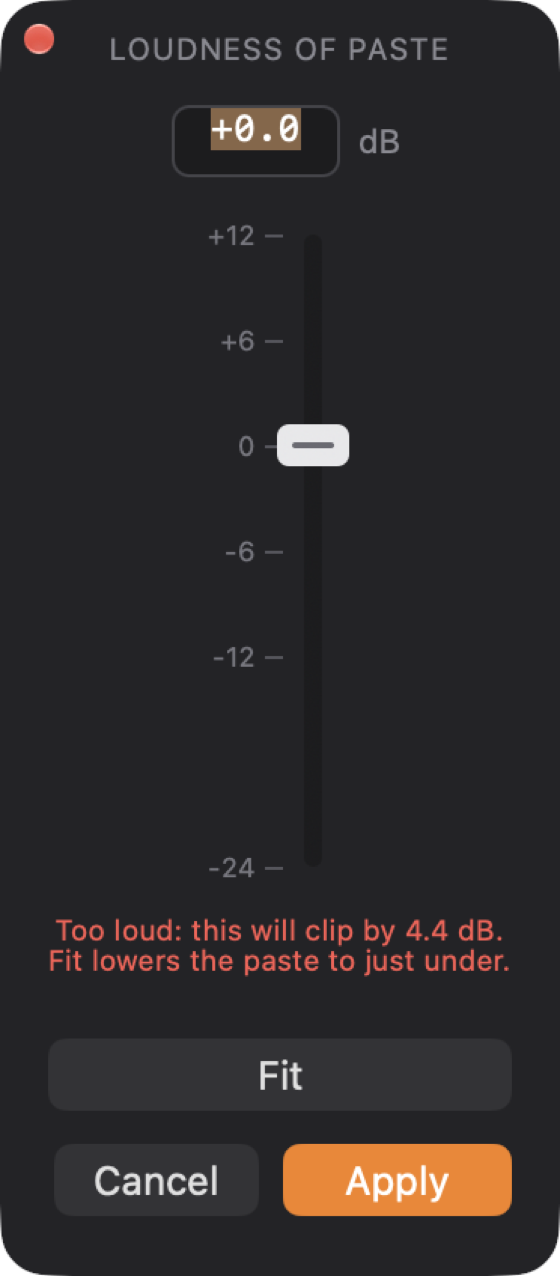
A line under the slider shows the loudest peak after mixing. If the mix would go over 0 dB it turns red and tells you by how much it would clip. Click Fit and FastTracker sets the loudest paste level that keeps the mix just under 0 dB. Paste Over uses the newest copy you made, from any window. Apply mixes the copied audio over what is there, from the playhead until it runs out; if it runs past the end of the file, the file gets longer. Nothing is left marked afterward and the playhead sits at the start of what was pasted. ⌘Z takes it all back, and any markers and Follow-Along flags inside it stay put. Paste Over is in Single Track Mode only, and you can put it on the favorites bar.
Whenever the recording is wider than the window, a scroll bar runs along the bottom of the waveform, in both modes. Its handle shows how much you are seeing and where; drag it, or click beside the handle to jump a page. In any mode you can also hold Option and drag the waveform: the cursor becomes a hand and you slide the sound along under it.
A dB scale (or a percent scale) runs down the right end of the waveform lane, one for each channel, so you can read how loud a peak really is. It is on to begin with. View ▸ Show Scale turns it off and on.
The column at the left of the waveform is your favorites bar: one-click buttons for the commands you use most. It starts with Normalize, Limiter, Fine Tune, Trim, Punch and Roll, ClipView, Add a Note, the Cookbook and the Effects Deck (if you have already set up your own bar, you keep yours), and you make it your own. The Multitrack window has a favorites bar of its own, with its own list (see Lesson 1).
Every command has its own icon, so you can find your favorite at a glance. The Cookbook has a frying-pan button (Show the Cookbook), the Effects Deck has three stacked cards (Effects Deck), and ClipView has an open tray (Show ClipView) and a tray with an arrow (Add Selection to ClipView).
The script slides out in the drawer at the right of the waveform, which also holds the Cookbook, ClipView and the Keyboard Guide, one at a time. Tap ShiftV (with the waveform active) to open or close the script to the width it last had, or drag the drawer’s bar. If you have a script open, Follow-Along can listen as you record and flag the words you said differently, and Script ▸ Sync Recording to Script can do the same for a recording you already have.
.ftdata file beside it. See Keeping the Script and Flags.Going the other way is just as easy: ⌘O a .fast project and you are in Multitrack Mode. The script, its size and width, the skipped notes and the flags all travel with the recording when you move between modes, and going back leaves no extra track just for the script.