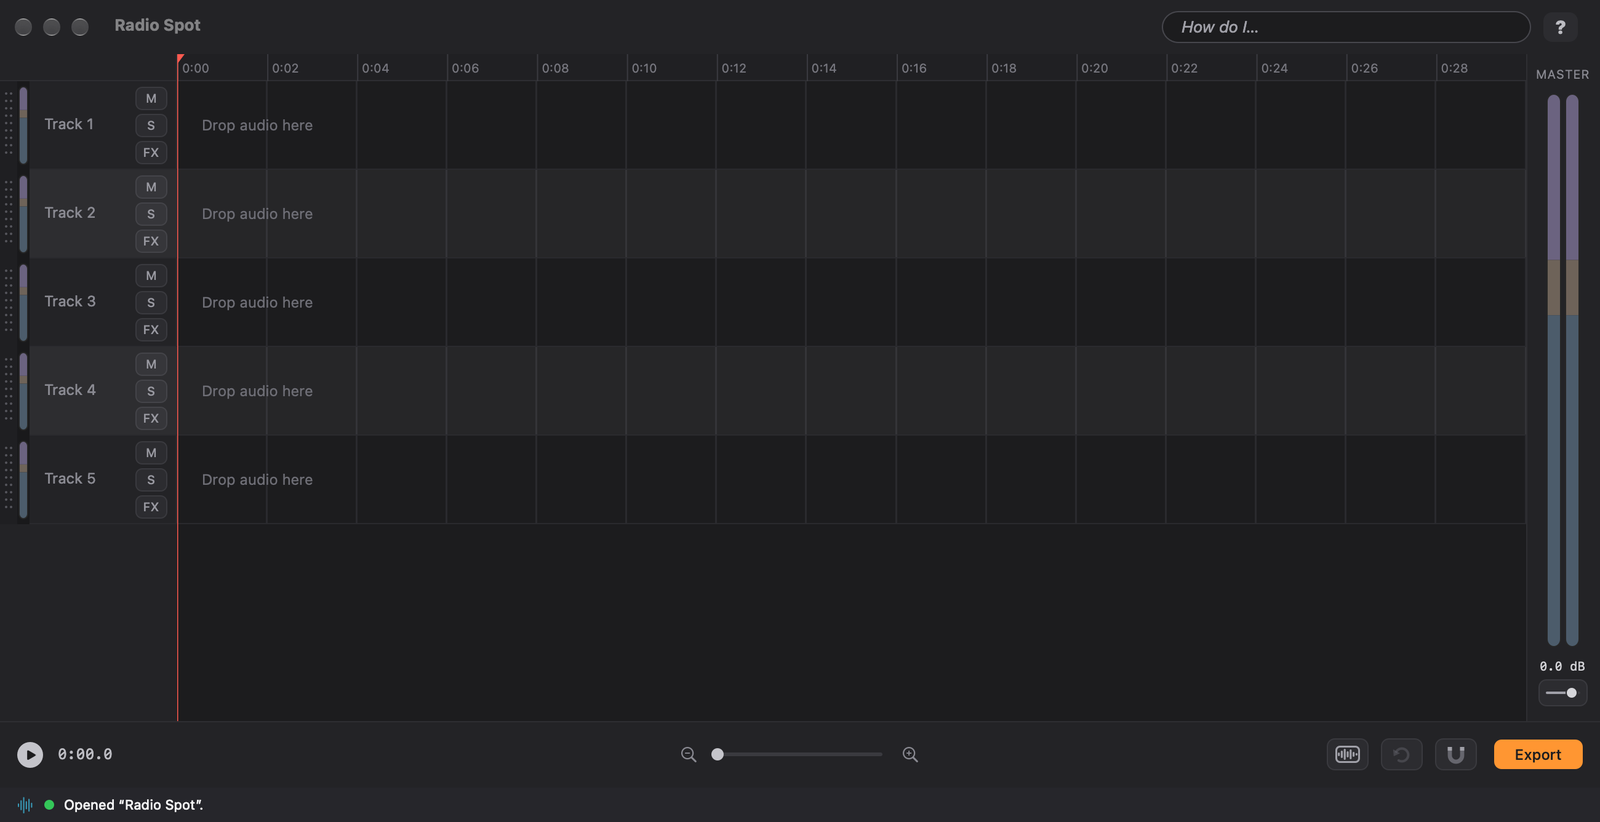
Let’s build a small multitrack project from scratch: a voiceover, a music bed, and a sound effect or two. You’ll bring in audio, arrange it, overlap it, trim it, save it, and send it out into the world.
FastTracker is really two editors in one, and the very first decision is which one you want. The Welcome Window asks you straight away:
| Multitrack Mode | Single Track Mode | |
|---|---|---|
| Welcome Window choice | Multitrack project: New, or Open a multitrack project… | Single track: Record an audio file, or Open an audio file… |
| What it is | A project (a .fast package) with many tracks that play together. | One audio file in its own window. Everything on screen is that one waveform. |
| Best for | Building a show or a spot: voice, music bed and effects, mixed together. | Making one recording sound right: recording, trimming, fixing levels, proofreading against a script. |
| What you get | Many tracks (⌘T adds one), clips you can slide, split, group and crossfade, faders, a pan envelope, effects (FX), ducking, Trim Silence, Record Over What Follows, and a mixdown on export. | A big waveform with a dB scale, a favorites bar of one-click buttons, Simple Limiter, fades, Reverse, Mute the Selection, Trim Unselected Audio, Copy One Channel onto the Other, Convert to Mono and Paste Over. |
| Shared by both | Recording (R), the script viewer and Follow-Along, markers, Normalize, Fine Tune, Insert Silence, cut, copy and paste of a marked selection, the ClipView, Save As and Export, and the How do I… box. | |
The tabs along the top are your open projects and files, in either mode: each tab is one project, or one audio file you opened, and each can be in either mode.
You are never locked in. The Mode Button (lower right, just left of Undo) moves you between the two:
Not sure? Start with Single Track if you have one recording to polish, and Multitrack if you are putting several sounds together. The Single Track lessons are a short series of their own. The rest of this lesson takes the Multitrack road.
Choose File ▸ New Project (⌘N). A small window asks “Begin the new project in single track mode or in multitrack mode?” Choose Multitrack for this lesson: click it, or use ↑ and ↓ to move the highlight and tap Return to press it (the highlight starts on the kind of project you used last; Esc cancels). It asks every time. The project opens in a new tab, with five empty tracks and a lot of potential.
(Starting from the Welcome Window instead? Click New multitrack project, which does the same thing without the question.)
There are three ways to get audio onto a track. Use whichever one feels natural.
WAV, AIFF, MP3, CAF and most other formats your Mac can play are welcome. The first file you add sets the project’s sample rate, and by default FastTracker copies each file into the project so everything travels together. (You can change that in Settings.)
Put different kinds of audio on different tracks: the voice on one, the music on another, effects on a third. It’s the same instinct as keeping your socks and your cables in separate drawers, and it pays off the moment you want to adjust one without disturbing the other.
Drag a clip by its name bar to move it. Slide it left or right to change when it plays, or up and down to put it on a different track. When a clip lands somewhere it can’t go, it turns red and springs right back. No harm done. (Want clips to line up perfectly? See Snap in Lesson 3.)
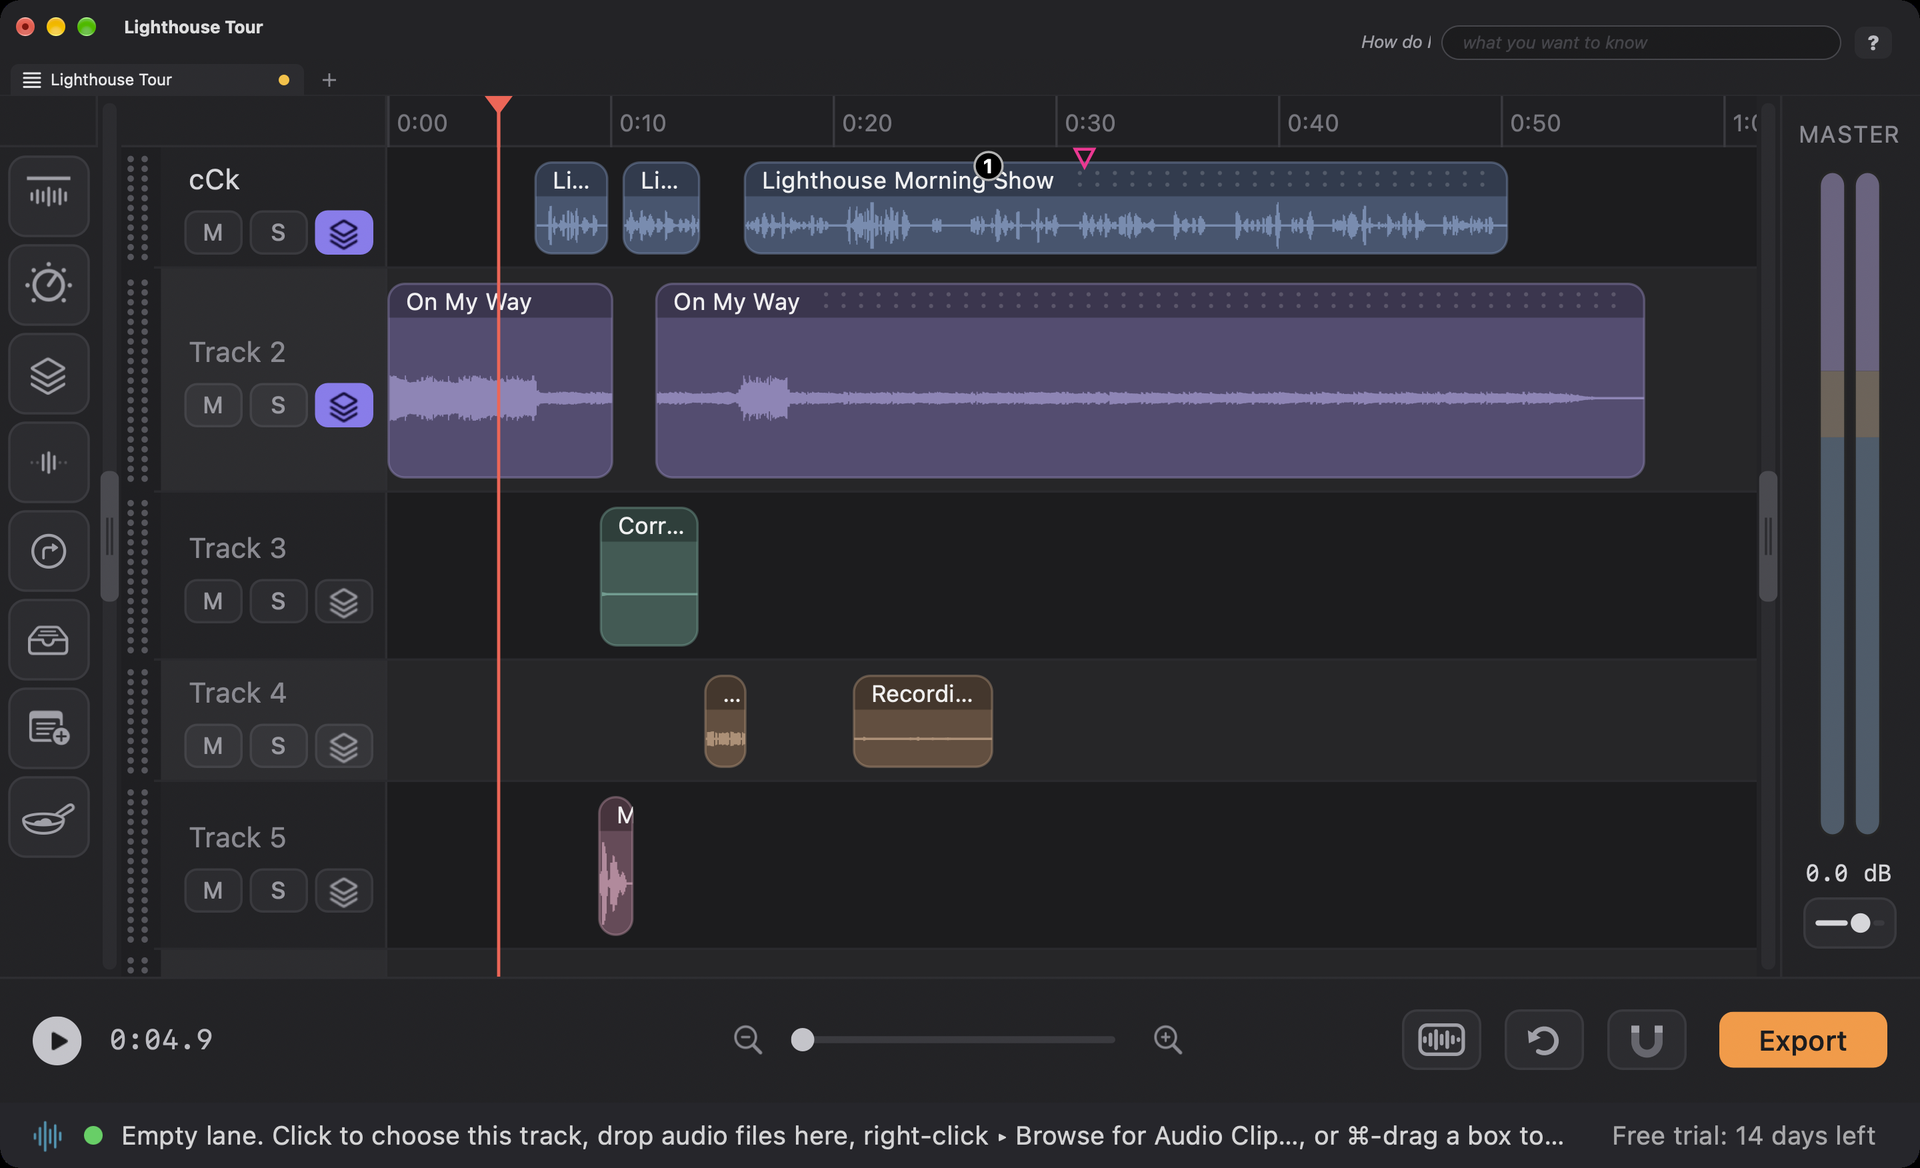
Need to carry a clip somewhere that isn’t on screen? Keep holding the mouse button and drag the clip toward the edge of the timeline. The view scrolls along with it, faster the longer you hold, so you can move a clip a long way without letting go. It works for dragging a selection box and trimming a clip too, and in every direction: left, right, up and down.
Sometimes you want to slide a clip and take everything after it along for the ride. Hold Shift and drag the clip by its name bar:
Only the track involved moves, so everything on your other tracks stays exactly in time. One ⌘Z undoes the whole thing. (A plain Shift-click, without dragging, still adds a clip to your selection.)
With a clip, several clips, or a group selected, tap ← or → to nudge them along the timeline in tiny steps (a hundredth of a second). Hold Option as well for bigger steps (a tenth of a second). Hold the key down to keep going. A run of nudges is one undo step. (With nothing selected, these same keys move the playhead instead.) A clip never goes before the start of the project or into more overlap than a crossfade allows.
Click a clip’s name bar to select it (and Shift-click to select more than one). Then ⌘C to copy and ⌘V to paste. The pasted clip lands at the playhead, so move the playhead first, then paste. To paste onto a particular track, choose it first: click its name, or a clip or an empty spot in its lane.
Two clips on the same track can overlap, and when they do, FastTracker turns the overlap into a smooth crossfade automatically: one clip fades out while the other fades in. You’ll see two crossing curves where they meet. It’s the easiest way to blend one voice into the next.
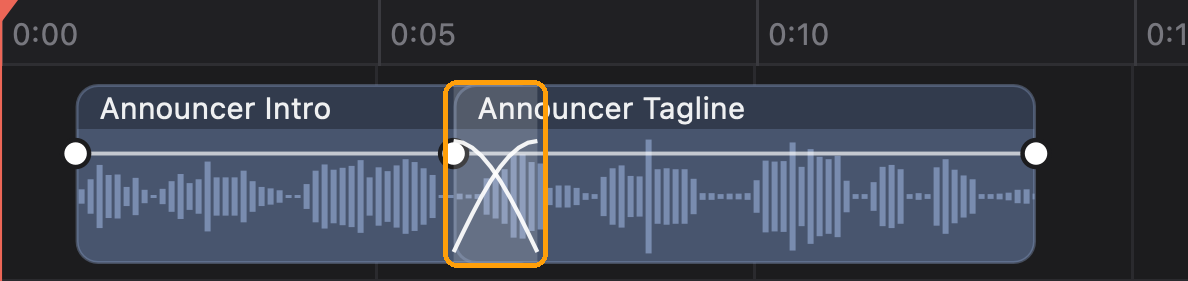
The overlap can be as long as half of the shorter clip. Try for more and the clip will turn red and bounce back, as a polite reminder.
Drag either end of a clip to trim it: pull the left end in to lose the beginning, or pull the right end in to lose the tail. Nothing is thrown away, since the audio is still in the file, so you can drag the edge back out to get it all back. Trim as often as you like.
Silence at the ends of a clip? Click the clip and tap T. FastTracker trims both ends to the first and last sound for you, leaving a hair of room so nothing is clipped. Select several clips first and it trims them all at once. No shaky-handed dragging.
Tap Space to play, and Space again to stop. To choose where to start, click the ruler or an empty part of a clip, and the red playhead jumps there. To go to the very beginning or end, use ⌘← and ⌘→. With no clip selected, ← and → move the playhead itself a hair at a time: 10 thousandths of a second, or a tenth of a second with Option held.
Drag the playhead to get around fast. Click and hold on the ruler or on an empty part of a track, then drag: the red playhead follows your pointer wherever you take it. Drag all the way to the left and it lands at the very start of the project in an instant. When you’re zoomed in, drag within about half an inch of the left or right edge of the track area and the view begins to scroll smoothly that way, a little faster the longer you hold, with the playhead going along. Let go when you’re where you want to be.
Squinting at a long project? Tap Z to see the whole thing at once, then tap it again to zoom back to the spot you were working on.
To take a cough, a pause, or a flubbed sentence out of the middle of a recording, just drag across it, right on the waveform, the way you would in any audio editor. A red band shows the selection: the part you have marked, inside the clips it passes over. (You can also grab the red triangle on top of the playhead and drag that; the track is the chosen one then, so click its name, a clip or an empty spot in its lane first.) The playhead sits at the start of the selection, so Space plays from there and stops at the end of the selection, then the playhead is back at its start, ready to play it again. Both edges of the red band can be grabbed (the pointer changes when you are on one): drag an edge to fine-tune the selection, even right past the other edge. Press Delete and that selection is cut out, everything to the right of it slides in to close the gap, and the two sides are shown as one unbroken clip, with no seam. (Underneath they are still two pieces, so nothing is rewritten and you can still trim or split at the join.) ⌘Z brings it all back.
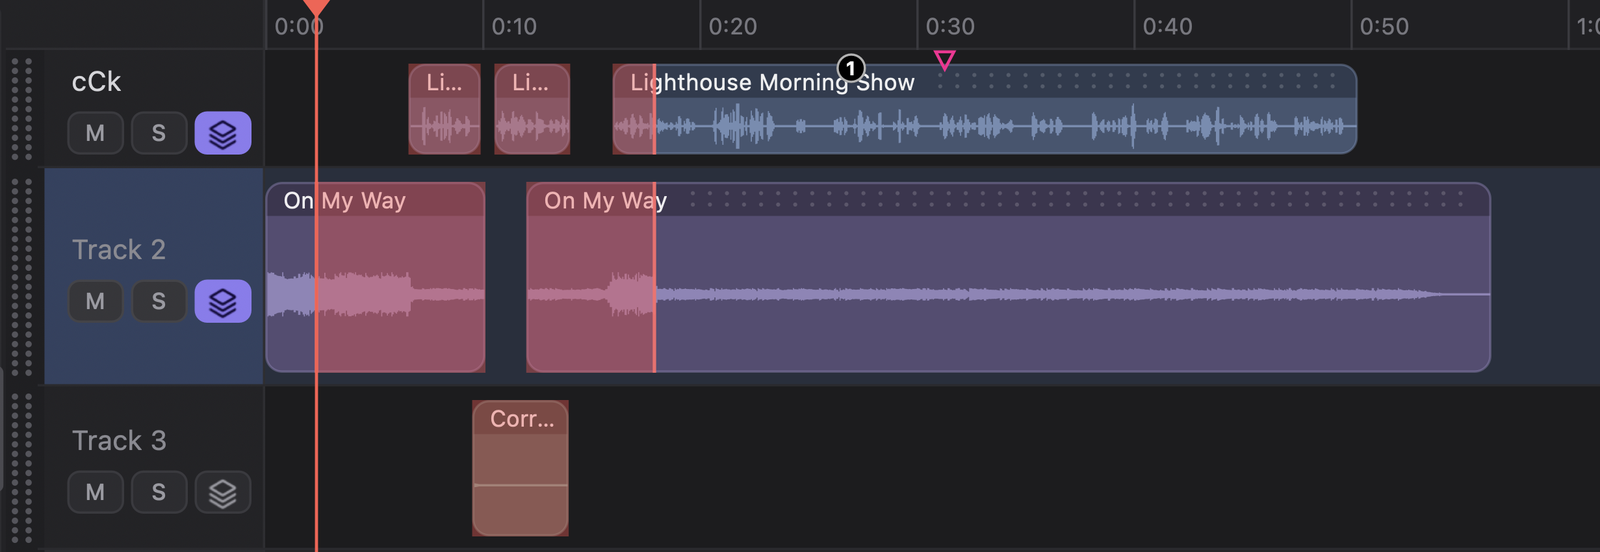
Hold Shift while you drag across a waveform (or while you drag the triangle) to mark the selection on every track at once, not just the clip you drag across. Delete then removes it from all the clips on all the tracks, so your voice, music and effects stay together. Changed your mind? Press Esc or click anywhere on the tracks to clear the mark without cutting anything.
Two quick keys for getting around: Shift-Space plays from the very start of the project, and ⌘E opens Export.
A selection moves around like any other piece of audio. Mark it (drag across the waveform), then press ⌘C to copy it, or ⌘X to cut it: that takes it out and closes the gap, exactly as Delete does, and keeps a copy on the clipboard. Now click where it should go, so the red playhead is there, and press ⌘V. The clips under the playhead are split there, the piece drops into the split, and everything to its right moves over to make room: a paste is the mirror image of a cut. Pasted into the very place it was cut from, it puts everything back exactly as it was.
Mark the selection with Shift and it is copied from every track, and pasted on every track, so your voice, music and effects stay together. Otherwise it goes on the chosen track (click a track’s name first, if you want a different one). The part you just pasted stays marked, so Delete or ⌘X takes exactly it out again, and one ⌘Z undoes the whole paste.
FastTracker pastes whatever you copied last: a selection goes in like this, whole clips (click a clip’s name bar first) land at the playhead as described above. A selection of just one channel can’t be copied or cut, because time can’t be taken from one side only.
Cutting, splitting and pasting inside a recording leaves lines where the pieces meet. In a long narration those lines are just clutter, so tap H to hide the splits: pieces of the same recording that touch on a track are drawn as one continuous waveform, with the name shown once at the start. Clips from different recordings always stay separate clips, with their own outlines, even when they touch. Tap H again to show every split again. Click a piece and its own outline appears while it is selected, so you can still see and move it.
The splits start hidden in Single Track Mode and shown with all the tracks. H changes the one for the view you are in, and FastTracker remembers each choice with your project.
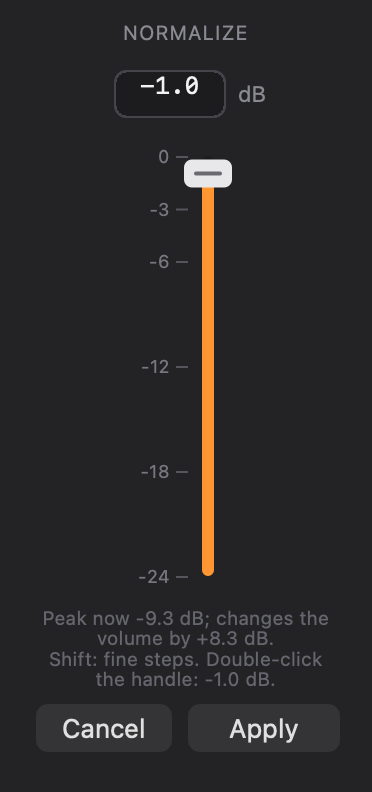
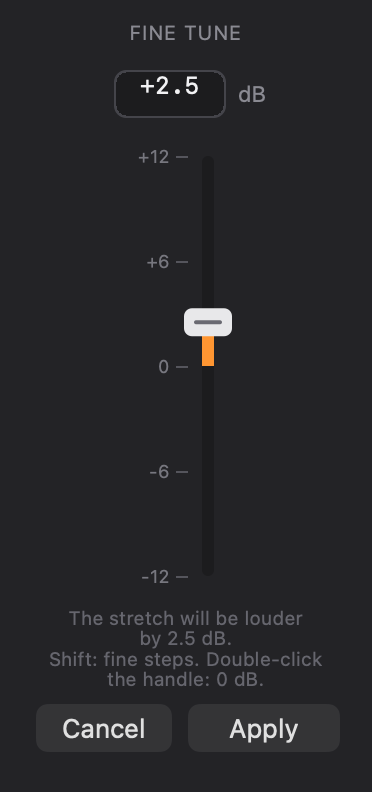
The selection (the red band you make by dragging across a waveform) is good for more than cutting. Press N to Normalize it: a fader sets how loud the selection’s loudest peak should be, and the window tells you how many dB that changes the volume. Press F to Fine Tune it: drag the tall fader, or tap the arrow keys, to turn the selection up or down by a few dB. If the change would push the loudest peak past 0 dB, the window says so in red (“Too loud: will clip by 2.5 dB,” for example), and Fit lowers the change to just under 0 dB. Both windows open with the number box ready: its number is selected, so you can type a new one right away (or move the fader, or tap the arrow keys). In both windows Apply (or Return, even while you are typing in the number box) makes the change and closes the window, and Esc closes it without changing anything. With no selection, N and F work on the selected clip or clips, each as a whole: Normalize sets the loudest peak across all of them, so their balance stays as it was.
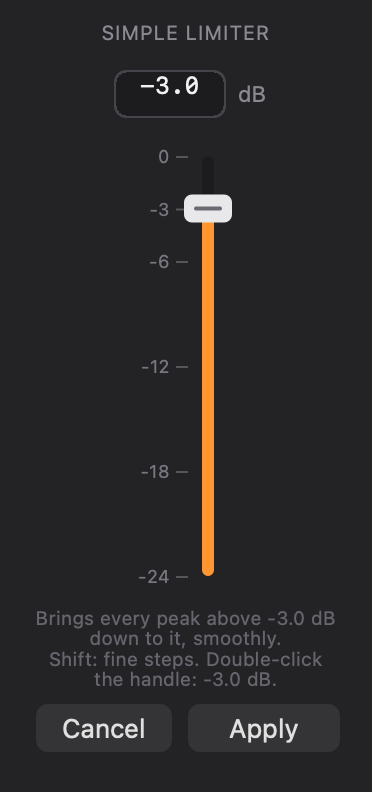
In Single Track Mode there is a third window of the same kind: press L to limit the selection (or the whole file, when nothing is marked). The Simple Limiter window has a fader and a number box for the ceiling, from -24 to 0 dB, starting at -3 dB. Apply brings every peak louder than the ceiling down to it, smoothly, and leaves quieter sound alone. It is one undo step. If nothing rises above the ceiling, the window tells you so. The Simple Limiter is only in the Single Track Mode window; in the normal view, L says so.
Unlike Delete, Normalize and Fine Tune don’t split the clip. The change is made on the clips’ volume lines (the white lines), with a quick fade in and out at each end of the selection so nothing clicks, and it’s one undo step. The selection stays marked, so you can fine-tune it again.
Mark a selection, then press Shift and M (in the Single Track Mode window the key is S). The audio inside the selection is muted (FastTracker splits the clips at its edges and mutes the pieces, exactly as the M key mutes a whole clip), on every track the selection was marked on. Press Shift and M again and it comes back. Nothing is deleted, and Undo takes it back.
The Audio menu has Convert Selected to Mono. With a selection marked it turns the stereo audio inside the selection to mono; with no selection it turns the selected clips to mono. Both sides then play the average of left and right. Your audio files are never touched, and Undo brings the stereo back. (A stereo file can’t be split into two mono files here.)
When one recording is all you want to work on, FastTracker can show it to you on its own. Click the Mode Button at the lower right, just left of Undo (a small rectangle with a waveform in it), and the chosen track, or the part of it you have marked, opens by itself in a Single Track Mode window. You can also open any audio file straight into the window with ⌘O. The whole story is on its own page: Single Track Mode. The rest of this lesson is about Multitrack Mode, but the selection, Normalize, Fine Tune and the other tools below work in the window too.
Getting back. In the window, the same button shows a few horizontal bars: click it and you are back in Multitrack Mode. If you changed anything, the result comes back as a new track, named after the original with “, Edited” added, directly below it.
Stereo clips show the left channel above the right, each with its own center line.
In Single Track Mode, hold Shift and drag across a stereo clip’s waveform. Start in the top half to select the left channel only, or in the bottom half for the right channel only. Then:
A clip you have converted to mono is drawn as a single waveform, since it has no separate channels.
Right-click a stereo clip and choose Split into Mono Clips. The clip becomes its left channel and stays exactly where it is (it is named “Name L”). A new clip with the right channel (“Name R”) is placed right after it, on the same track, and every later clip on that track moves to the right to make room, so nothing overlaps. Each half plays its own channel in both speakers. The clips’ volume lines and gain are copied to both, a muted or turned-down channel goes with its half, and your audio files are never touched. ⌘Z puts the stereo clip back in one step. If several stereo clips are selected, all of them are split. Clips that are already mono, or already one channel, aren’t offered the choice.
In Single Track Mode the track header (the dot meter and grip, the name, and M, S and FX under it) starts folded away, leaving a thin gray bar with a small handle at the left edge. That gives the waveform a good deal more room, especially with the script viewer open. Drag the bar to the right to open the header part or all of the way (it opens to the width it always had), or double-click the bar to flip between completely closed and fully open. FastTracker remembers the width you chose and uses it the next time you enter Single Track Mode. With all your tracks showing, the header is always full width. Only the track you see is heard in Single Track Mode, so you rarely need mute and solo there; open the header when you want the track’s effects (FX).
Drag the thin bar at the right edge of the track area to the left and the drawer slides out, showing your script: a text, Word or PDF file you can read while you record. The same drawer also holds the Cookbook (C), the ClipView (I) and the Keyboard Guide (K), one at a time. See The Script Viewer.
Right-click in a track, or on its name, and choose Remove This Track. If it has clips, FastTracker asks first. Your audio files stay where they are, and Undo brings the track back. (This isn’t offered in Single Track Mode.)
Press ⌘S and give your project a name. FastTracker saves it as a single .fast file (which is secretly a package holding the project and its audio, so you can move it around like any other document). FastTracker also keeps a safety copy while you work (rewritten every ten seconds, and the moment a recording ends or before an export or file window opens), so even a crash won’t cost you much. See Projects & Settings.
When it sounds right, press the orange Export button in the lower right (or ⌘E). A small window asks what kind of file you’d like.
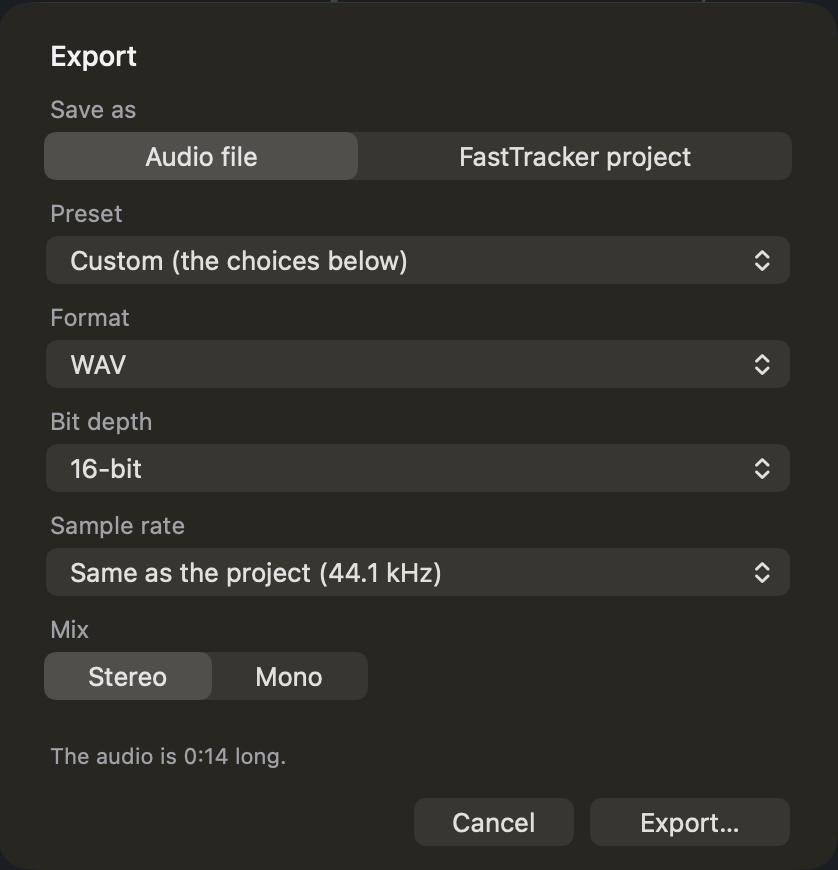
Commonly, a WAV file at the project’s own sample rate does the job. Press Export…, choose a name and a place, and FastTracker mixes everything exactly as you heard it. All the choices, and what to do if the mix is a little too loud, are in Exporting.
Next: Lesson 3 — Shaping the MixMute, solo, volume lines, pan, splits, and groups.