Setup Instructions
Setting it up takes about 5 minutes.
You'll need your computer's administrator password handy. Stuck on any step? Call us at 920-672-8244 and we'll walk you through it.
Step 1
Download the installer
Click the big Download for Mac button at the top of this page. A file called TuneTrackerConnect-AppleSilicon.pkg (or TuneTrackerConnect-Intel.pkg if you're on an older Mac) will save to your Downloads folder.
Step 2
Run the installer
Find the file in your Downloads folder and double-click it. Apple's standard installer wizard will open.

- Click Continue on the welcome screen.
- Click Install.
- Enter your administrator password when prompted, then click Install Software.
- When the installer says "The installation was successful", click Close.
That's it — TuneTracker Connect is now installed in your Applications folder, with our server settings pre-configured. You don't need to type anything.
Step 3
Open it for the first time
Open your Applications folder (click your desktop, then choose Go → Applications from the menu bar). Find RustDesk in the list and double-click to open it.
The RustDesk window will appear. Look at the bottom of the window — you should see a green dot with the word Ready. That means it found our server automatically.
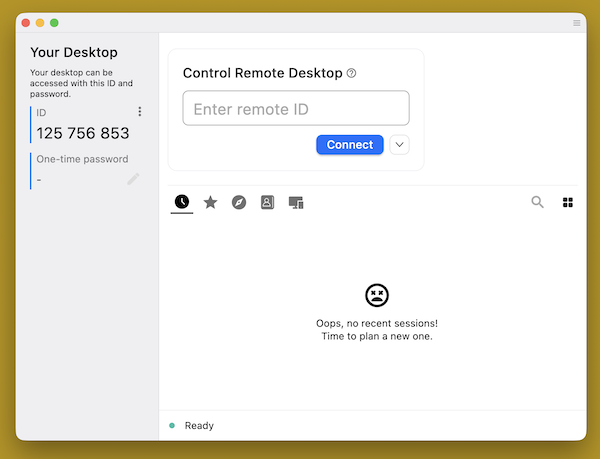
You'll also see a 9-digit number near the top of the window, like 123 456 789. Make a mental note of it — we'll need it in Step 6.
Step 4
Grant three permissions (the fiddly part)
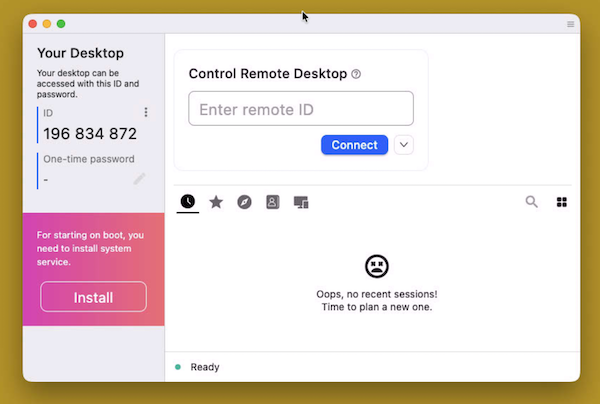
macOS won't let any program control your computer remotely unless you give it permission. You only have to do this once, and RustDesk walks you through it — you don't have to go hunting through System Settings on your own.
On the left side of the RustDesk window, you'll see a Permissions panel with a Configure button. The first permission it asks for is Screen Recording.
Here's what to do:
- Click the Configure button.
- macOS will pop up a dialog — click Open System Settings.
- System Settings opens with RustDesk already in the list. Click the switch next to it to turn it on. Enter your administrator password if asked.
- macOS may ask you to quit and reopen RustDesk. If so, click Quit & Reopen.
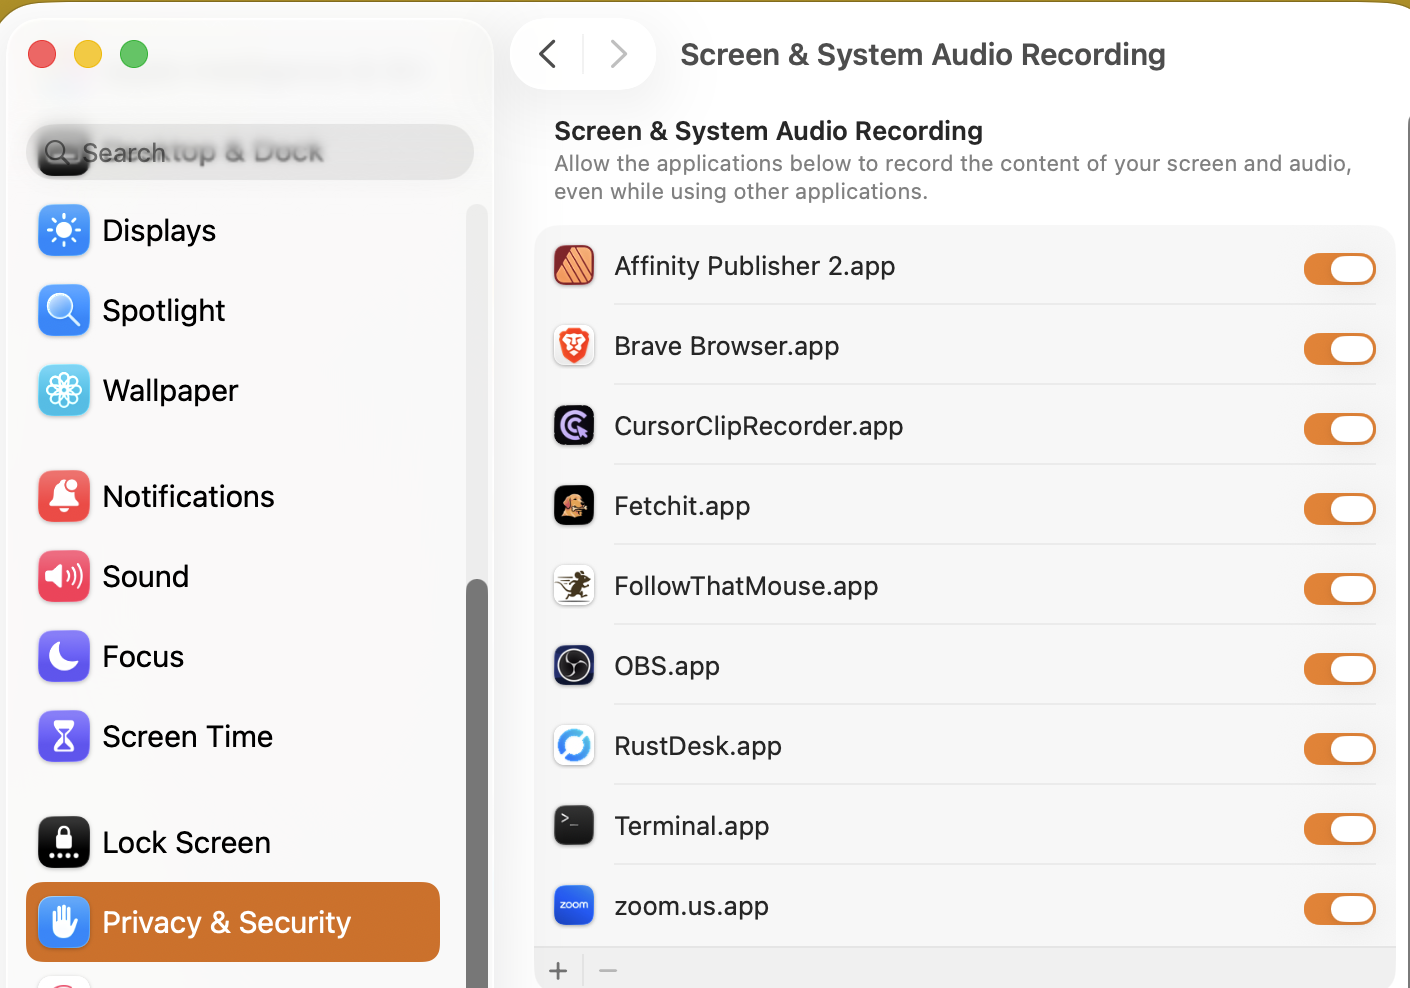
After RustDesk reopens, the Permissions panel will ask for the next permission — Accessibility. Repeat the same steps: click Configure, open System Settings, flip the switch, quit and reopen if prompted.
Do it one more time for the third permission: Input Monitoring.
Step 5
Set a permanent password
This lets us connect when you call for support without you having to read us a code each time. You'll set a password that only you and TuneTracker know.
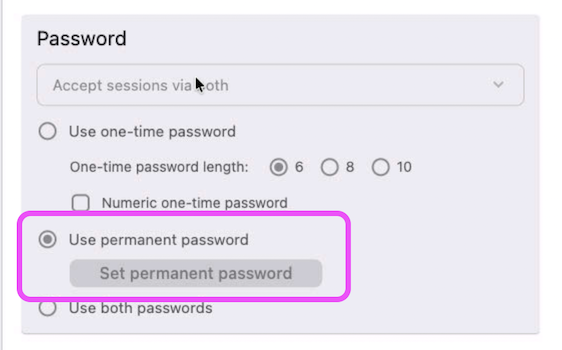
- In the main RustDesk window, look on the left side for One-time password. Right next to it is a small pencil icon — click it.
- This opens the Settings page. At the top, you'll see a lock icon — click it and enter your administrator password to unlock the settings.
- Find the Password section. Choose Use permanent password, then click Set permanent password.
- Type the password we gave you for your station (it looks like TT-XXXX-1234, where XXXX is your station's call letters). Confirm and save.
- Close the Settings page — you're back at the main window.
Step 6
Tell us your 9-digit ID
Look at the top-left of the RustDesk window. You'll see ID with a 9-digit number underneath it (like 123 456 789).
Send us this number — whichever way you prefer:
- Phone: 920-672-8244
- Online: Send it via our contact page
That's the only piece of information we need. We'll save it on our end and use it any time you call for help.
Step 7
Done — leave it running
That's it! TuneTracker Connect now runs quietly in the background. You don't need to interact with it. You can close its window if you like — it will keep running and we'll still be able to connect when you need us.
It starts automatically each time your computer starts. You'll know it's working because there's a small RustDesk icon in your menu bar (the strip across the top of your screen).